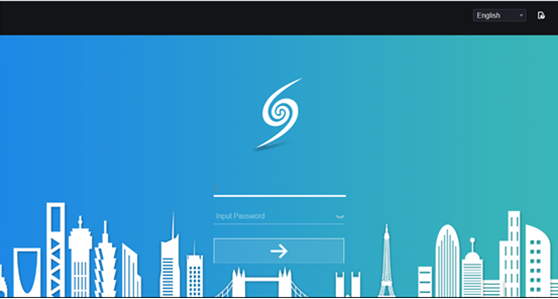
1. Download and install the correct application
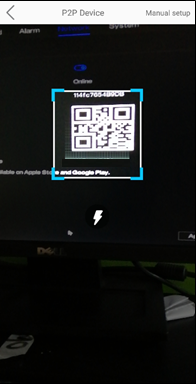
2. Ensure that the device is connected to a network and the status is ‘Online’. You can find this information in Setting > Network > P2P
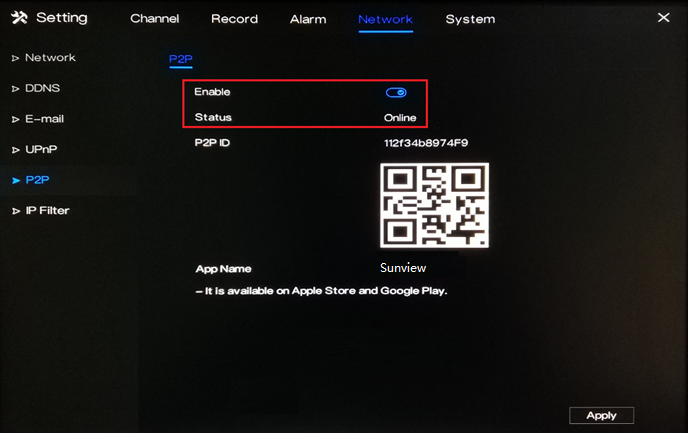
3. To ensure that the device is connected to the network properly, one example in below.
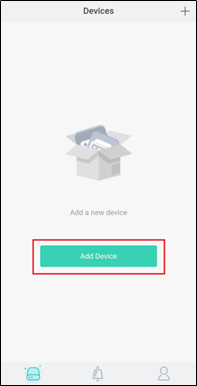
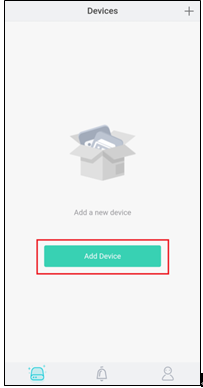
4.Open the app on your mobile phone. Click Add Device
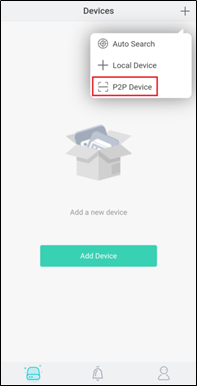
5. Tap P2P Device and then scan the QR code that is shown on your device’s interface. The QR code is located in Setting > Network > P2P.
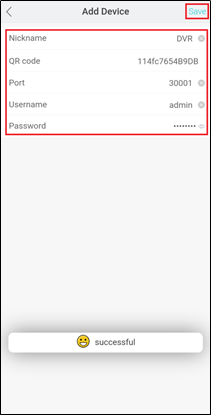
6. Input the needed information on the app.
1) Enter a Nickname.
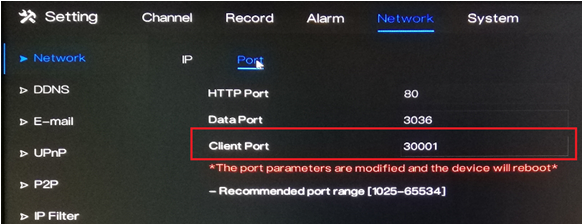
2) In the Port field, input the Client Port indicated in the device setting. This information can be found in Setting > Network > Network > Port.
Please note: The default value of the Client Port is 30001. If you changed it to a different number, please make sure to input the new port number in the app.
3) Enter the Username and Password of the device.
4) Hit Save at the upper right corner to the save the information.
1.Download and install the correct application
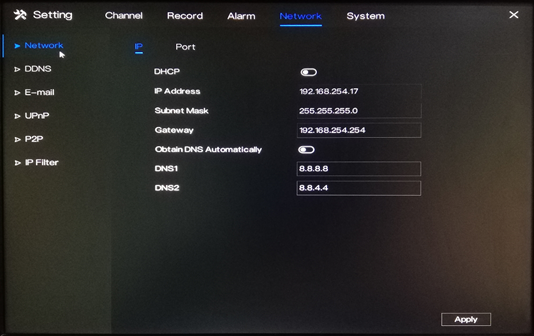
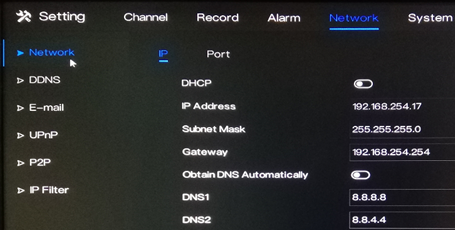
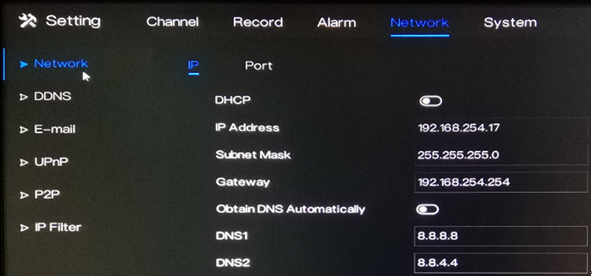
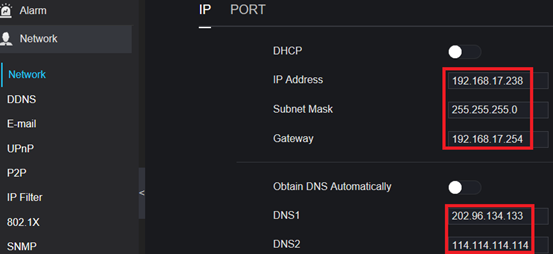
2.Ensure that the device is connected to the network properly. Check if the device’s network setting is set up correctly. You can find this in Setting > Network > Network > IP.
1)The device’s IP Address should be in the same range as the router’s gateway.
2)Subnet Mask should be same as what is indicated in the router’s network setting.
3)The Gateway should the router’s gateway or local IP address.
4)DNS 1 and DNS 2 can be your router’s DNS servers or you can use 8.8.8.8 and 8.8.4.4.
3. If you would like to use DDNS in adding the device to the app, please enable the DDNS first.Go to 1)Setting > Network > DDNS.
2)Click the toggle switch to Enable DDNS.
3)Choose one protocol.
4)Input a Domain Name inside the box.
4. If you would like to access the device remotely via WAN (external/public) IP or DDNS address using your mobile phone, you have to open/forward the Client Port of your device.
1)The Client Port can be found in Setting > Network > Network > Port.
2)The default value is 30001. If you changed this to a different number, please open/forward the new port number.
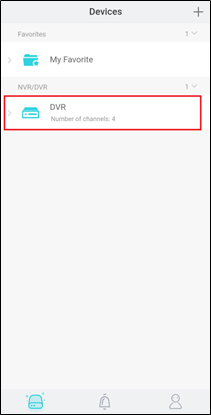
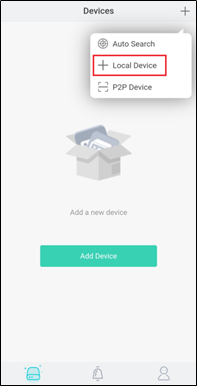
5. Open the app on your mobile phone. Click Add Device. Tap + Local Device.
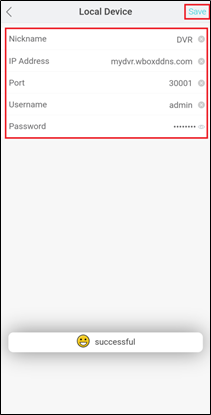
6. Input the needed information on the app.
1)Enter a Nickname.
2)In the IP Address field, enter the local IP address, WAN (external/public) IP address or the DDNS address of the device.
3)In the Port field, input the Client Port indicated in the device setting. This information can be found in Setting > Network > Network > Port.
note:The default value of the Client Port is 30001. If you changed it to a different number, please make sure to input the new port number in the app.
4)Enter the Username and Password of the device.
5)Hit Save at the upper right corner to the save the information.

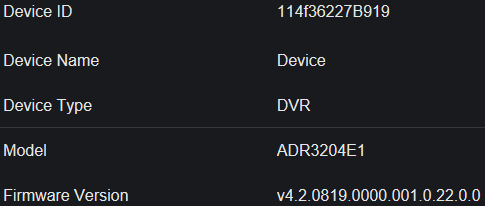
Firmware Version: V4.2.XXXX.0000.XXX.X.XX.X.X
1. Ensure that the device is connected to the network properly.
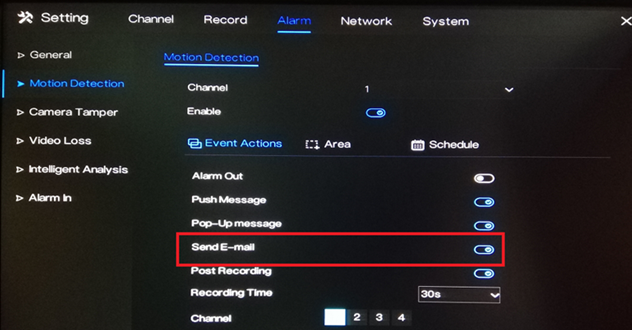
2. Make sure that the alarm settings are properly set up and Send E-mail option is enabled. Alarm e-mail notification can be enabled for Motion detection, video loss or camera tamper.
Motion Detection – Setting > Alarm > Motion Detection > Event Actions > Send E-email
Camera Tamper – Setting > Alarm > Camera Tamper > Event Actions > Send E-email
Video Loss – Setting > Alarm > Video Loss > Event Actions > Send E-email
Intelligent Analysis – Setting > Alarm > Intelligent Analysis > Event Actions > Send E-email
3. Go to Setting > Network > E-mail.
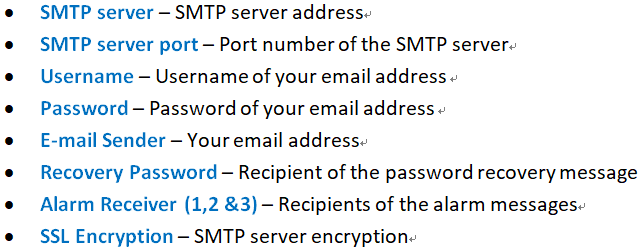
4. Input the correct SMTP setting of your account.
5. Click Test to test if the information you input are correct.
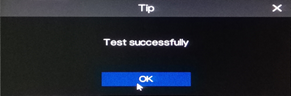
6. Check your e-mail account to see if you received the test message. If test e-mail was received successfully, click Apply to save the settings.
it’s the theoretical value
The capacity of storage space should be calculated according to the days, bit rate and type
1.Bit rate: 2Mb (for example)
|
channel and time |
Disk space required |
|
1 channel for 1 hour |
2048Kb/8Byte*3600sec*=921600KB=900MB |
|
1 channel for 1 day |
900MB*24=21600MB≈21.09GB |
|
1 channel for 30 days |
21.09GB*30≈632.81GB |
|
16 channel for 30days |
632.81GB*16≈10125GB≈9.89TB |
1.Bit rate: 4Mb (for example)
|
channel and time |
Disk space required |
|
1 channel for 1 hour |
4096Kb/8Byte*3600sec*=1843200KB=1800MB |
|
1 channel for 1 day |
1800MB*24=43200MB≈42.19GB |
|
1 channel for 30 days |
42.19GB*30≈1265.7GB |
|
16 channel for 30days |
1265.7GB*16≈20251.2GB≈19.78TB |
2.Bit rate: 6Mb (for example)
|
channel and time |
Disk space required |
|
1 channel for 1 hour |
6144Kb/8Byte*3600sec*=921600KB=2700MB |
|
1 channel for 1 day |
2700MB*24=64800MB≈63.28GB |
|
1 channel for 30 days |
63.28GB*30≈1898.43GB |
|
16 channel for 30days |
1898.43GB*16≈30375GB≈29.66TB |
Note:these tables are only for reference, and the actual values have the redundant.
Full duplex :
Data communication allows data to be transmitted in both directions simultaneously. Like the switch or telephone, The network card can also receive data while transmitting data, and the two are synchronized.
Half duplex:
Data transmission allows data to be transmitted in both directions, but at a certain time, only data is allowed to be transmitted in one direction。 like Walkie-talkie
YES, it can be done like this.
However, 265 encoded video can only be realized when accessing the H.265 camera, saving space. If the H.264 camera is connected, this function cannot be realized.
1. NVR+HDD: the NVR is connected to the network camera, it is recommended to fix the IP address of the NVR. In the system configuration, network configuration, basic configuration interface, do not enable automatic acquisition of the IPV4 address, manually assign an IP to the NVR. In this case, in the case of an external network interruption, as long as the LAN is connected [the network between the camera and the NVR] without interruption, the recording will continue. The NVRis connected to an analog or coaxial camera, and whether the network is connected does not affect the recording.
2. IP Camera +SD card: the external network or LAN interrupt will not affect the recording.
please make sure the power supply is stable, or you can change a new one
if the NVR stop at the booting screen, maybe the main program(firmware) has the problem ,please contact the tech support to check it remotely .
If the NVR restart automatically, please update the firmware to the latest version.
1. Camera power supply is unstable, test with new power supply.
2. Network cable Problems, or Check Switch Ports, or Replace new Switches.
3. Restore factory settings or upgrade new programs.
1.One network port connects the camera and the other one connects the router connecting the external network.
2.Or one network port connects the IP address of one segment and another network port connects the camera of another segment.

NVR with two network ports can set different IP addresses for two network ports.
Whether you want to use it or not depends on your own situation.
2. Network setting
Please enter the valid values:
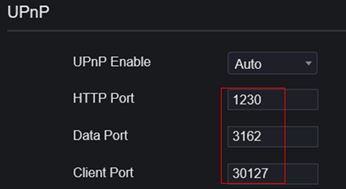
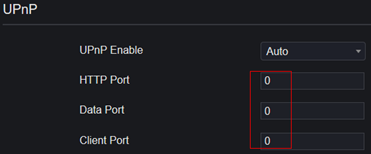
3. Check the status of Upnp option
If the Networking setting and router setting are correct, the Upnp will get the current ports, too.
Otherwise,if you get “0” for each port,please check your network and router setting.
4. DDNS
Enable this option and then select the proper protocol you want:
1) sunellddns
enter a name, then click [Test]
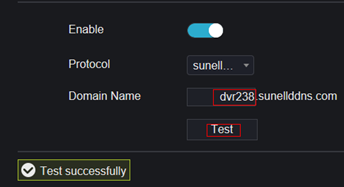
If it shows “Test successfully ”,
Then you can enter “dvr238.sunllddns.com:1230” in IE broswer
Note: 1230 is the HTTP Port in the option “UPnp”